
The Furious Mezzanine – 2nd Floor
Lets take a look at the title for completing all the achievement in The Furious Mezzanine – 2nd Floor.
Title
Attack Power + 60 ~ 60
Magic Power + 60 ~ 60
STR + 40
VIT + 40
AGI + 40
INT + 40
Critical + 100
Final Damage + 30
Obviously, this title beats Ultimate flat, which has only 15 FD as compared to the new title with 30 FD.
For those who don't know, here's a little tidbit- Players with higher than 1000 - 1100 FD will receive a 2 - 3% bonus in damage when changing to this title from Ultimate or Dejected, in other words, its totally worth the effort to get the new title, hence this guide exists.
Well first of all, I've noticed that since the release of 450.Mark Patch, there are less than a handful of people getting this title, at least from what I see in Westwood, being online most of the time or Afishing, I hardly, or in fact, don't see anyone getting this title announcement despite it being a very very very great and highly rated title.
Secondly, I've found out the reason why most people are unable to get this title, which is because the entire achievement list's description is totally misleading and wrong, hence we did a research for one whole day with my guildmates and friends in order to find out the exact and the fastest way to get this title, and now I'm here to share with you all.
Title
Attack Power + 60 ~ 60
Magic Power + 60 ~ 60
STR + 40
VIT + 40
AGI + 40
INT + 40
Critical + 100
Final Damage + 30
Obviously, this title beats Ultimate flat, which has only 15 FD as compared to the new title with 30 FD.
For those who don't know, here's a little tidbit- Players with higher than 1000 - 1100 FD will receive a 2 - 3% bonus in damage when changing to this title from Ultimate or Dejected, in other words, its totally worth the effort to get the new title, hence this guide exists.
Well first of all, I've noticed that since the release of 450.Mark Patch, there are less than a handful of people getting this title, at least from what I see in Westwood, being online most of the time or Afishing, I hardly, or in fact, don't see anyone getting this title announcement despite it being a very very very great and highly rated title.
Secondly, I've found out the reason why most people are unable to get this title, which is because the entire achievement list's description is totally misleading and wrong, hence we did a research for one whole day with my guildmates and friends in order to find out the exact and the fastest way to get this title, and now I'm here to share with you all.
Well so what are the requirement to get this title then?
For those who have the Dark Knight title in the achievement list, you do NOT need to fulfill the requirement of fighting your way up from Round 1 - 35 in order to get the title, but you will need 'True winner' in order to get the title though, in other words, you need to complete at F2 at least once to complete the whole thing.
Is there anything we should know beforehand?
Yes, there's only a completion limit of two per week, so its best that if you do not complete all the achievement, leave the dungeon before you finish round 35, or 34 in fact if you're doing achievement run, and restart from 21 again.
So without further ado, lets start from the top of the achievement list to the bottom last one.
Hatred Pirandello Floor 2 Achievement List
Always happy for a new challenge!, I could rest here! and True winner!!!
Self-explanatory, its advised to do this last since you need to complete R35 in order to obtain this title, unless you have a spare run for the week.
Crazy Duck Savior
Obtained if 21 round is cleared without catching the Crazy ducks.
Basically, do not kill any Crazy ducks at the end of Round 25 and Round 30, which is after the bracket's boss (Manticore and Apocalypse).
You may hit the Origin Duck that drops Origins though.

If you're unsure of which can be hit and which cannot be hit, refer to the SS above.
The Golden shining duck a.k.a. Origin Package Duck can be hit while the rest of the black-colored Crazy Duckcannot be hit at all.
Catched the 4 3 spies.
Obtained if all of the green goblin that randomly comes out at each round are defeated.
Apparently, this is the second hardest achievement of all to obtain and it requires high situational awareness and teamwork. There will be a Green Goblin that spawns randomly from any portal at any stage and have to be killed within a few seconds, otherwise he will disappear and the achievement will be failed.
What you need to know - Separate the entire game into three bracket.
Round 21 - 25, Round 26 - 30, Round 31 - 35 respectively.
In every bracket, there will be one Green Goblin that comes out randomly, for example, it can be Round 21, 27, and 33.
They will come out randomly at one of the white portals.
Strategy - Assign every party member at each side of the map (north, south, east, west), and the key to finding the Green Goblin is that whenever at the beginning of a new round, if he spawns, there will be a war horn sound blowing just like the one you hear at DOK/DOTC.
Below is a video to show how to detect and kill the Green Goblin (I'm not sure if i recorded the sound since my comp is pretty screwed, apologies )
)
NOTE : All the party members have to on their in-game Dragon Nest Sound to hear the war drum.
There's a bug with the Green Goblin whereby they don't spawn at all the possible rounds in the 3rd bracket, this is definitely a bug from the dev's side and if you encounter this, you're just unlucky.
They will not spawn at mission stage like Round 23 (White Hermia) as well.
They will not spawn at survival stages like Round 31 (Mushroom Stage), Round 27 (Lich Stage).
They will not spawn at Boss stages as well, like Round 25 (Manticore), Round 31 (Apocalypse).
He will have a ! mark just like the provoke sign, so its easier to notice him with that. Refer to SS below.

Hatred Pirandello 2 floor challenge mission completed.
Complete all the Hatred Pirandello 2 floor mission.
You don't say ask
[Mission Challenge] - Four Card.
Round 26. Basically, just kill all the small mobs a.k.a. Hatred Dark Elf, and leave all the four purple-named bosses alive. Refer to SS below.

NOTE : Just like Round 32, this stage is random, there are 3 different random stage for Round 26 IIRC.
[Mission Challenge] - Gold Mimic's Curse.
Obtained if every mimic is eliminated within 30 seconds and lose the draw from the event box.
Round 28.
This is the hardest achievement after Goblin Spy's achievement in the whole of P2 Hatred, and has the most misleading description of all as well, this is also one of the main reason why most people couldn't get the achievement title so here goes.

Refer to the SS above.
Basically, to put it simply, you have to kill it in this order - Gold Mimic Chest Boss a.k.a. the Royal Chest boss first, followed by the Pirate boss a.k.a. Captain Darlant, then finally the small Hatred Mimic mob.
In order not to confuse anyone, the trick is that at least one Hatred Mimic mob must be alive so you can complete the killing order.
Strategy - One member lure away as many Hatred Mimic as you can to one side of the map, the rest kills the Gold Mimic boss first followed by Darlant, then finally clear the field. Its okay to kill a few Hatred Mimic during the crossfire in the boss' fight as long as the bunch of mobs at the aggro holder's side is safe.
Then of course the last part, choose the wrong chest, no trick involved here, just pure luck, get the wrong one and congratulations, you've cleared the hardest achievement of the entire dungeon, get the right one? Leave the dungeon and rush your way to Round 28, rinse and repeat
NOTE : I've heard many saying that they followed the requirements above and still didn't get the achievement, according to me testing it myself for more than x rounds while helping most players in Westwood to get it, I've encountered 0% failure rate and 100% success rate WHEN killing them in order and getting the wrong chest with rotten meats, so unless I'm being too lucky on a not-confirmed method/highest-possibility-to-achieve method, something must have gone wrong on your side, just re-do.
This achievement has absolutely nothing to do with the 30-second requirement stated or any time factor as well.
[Mission Challenge] - Pungent Red Mushroom.

There will be like four to six (can't remember the exact amount of red mushrooms) spreaded evenly across the map just like the green ones, just kill all the red ones ASAP and its okay to kill the green ones as well.
[Mission Challenge] - Saving Blan.
Actually this is kinda straightforward, but you need luck as well since you will get either Zebrill or this stage randomly at Round 32, just kill all the monsters and protect the small Cyclops and you're done.
♥ [Mission Challenge] - Stone's rolling!!
Obtained if 4 half Golems are killed in 10 seconds.
Once again, misleading description is misleading, you don't have to kill all of them in 10 seconds, its impossible technically since the time all 5 takes to spawn is more than 10 seconds as well.
Just like the lizard stage of SDN, kill all five of them within 10 seconds and you're done.
Strategy - Lower all of their HP in sync, then lure all of them into the middle as near as possible, use your biggest AoE skill/Ultimate and you're done.
Well, that's about it for the entire achievement list! Do note that it takes really lots of luck and patience to do it, if you're unlucky, you might take few hours or so, if you're lucky, one round/20-30 minutes will settle it.
Tips to make your life easier in your conquest to getting Removing Darkness.
Not encouraging discrimination, but the best line-up you could get to make your life easier.
♦ Saleana / Elestra (Fire Elestra)
Nope, nothing to do with double-freezing, but double freezing is quite effective at certain stage. Flame Road and Fireball are the key here to making your life easier, with elements affecting your damage and the massive AoE and damage of Flame Road and Fireball respectively, you will need them to speed up certain stage for ya.
♦ Physician and Academics in General
Massive heal in Dark Lair, Love Virus, element infused skills, big AoE of Magma Wave and Icicle Expression, what else can you ask for?
Auto Dispenser, best effect with Skill Ring +1.
♦ Mercenary in general.
Battle Howl, obviously. Oh and Howl Charging, a well-timed HC with a good situation awareness Merc is a plus.
♦ Priest (Inquisitor preferably)
Consecration is a very effective utility, Cure relics and Healing relics as well.
Bind Relic to hold a certain mobs at certain stage, Lightning Relic to lure everything into middle in case you guys wanna rush.
♦ Force User in general.
Beyond Time, OP Laser Cutter, element infused skills of Majesty and Mirrors, what else?
♦ Paladin in general.
Conviction/Elemental Auras, element infused skills, great synergy with Inquisitor.
You can actually lure everything into the middle for better clearing if you have great AoE companions.
Aaaaand, those Red Mushroom ???? Flavor gives you a random 30 sec Spirit Boost, 80% CD reduction buff or Divine Avatar.
Oh and did you know, Love Virus invincible effect affects ALL the mobs at Dark Lair 2 including Geraint, not all mobs can be induced with frozen status.
For those who have the Dark Knight title in the achievement list, you do NOT need to fulfill the requirement of fighting your way up from Round 1 - 35 in order to get the title, but you will need 'True winner' in order to get the title though, in other words, you need to complete at F2 at least once to complete the whole thing.
Is there anything we should know beforehand?
Yes, there's only a completion limit of two per week, so its best that if you do not complete all the achievement, leave the dungeon before you finish round 35, or 34 in fact if you're doing achievement run, and restart from 21 again.
So without further ado, lets start from the top of the achievement list to the bottom last one.
Hatred Pirandello Floor 2 Achievement List
Always happy for a new challenge!, I could rest here! and True winner!!!
Self-explanatory, its advised to do this last since you need to complete R35 in order to obtain this title, unless you have a spare run for the week.
Crazy Duck Savior
Obtained if 21 round is cleared without catching the Crazy ducks.
Basically, do not kill any Crazy ducks at the end of Round 25 and Round 30, which is after the bracket's boss (Manticore and Apocalypse).
You may hit the Origin Duck that drops Origins though.
If you're unsure of which can be hit and which cannot be hit, refer to the SS above.
The Golden shining duck a.k.a. Origin Package Duck can be hit while the rest of the black-colored Crazy Duckcannot be hit at all.
Catched the 4 3 spies.
Obtained if all of the green goblin that randomly comes out at each round are defeated.
Apparently, this is the second hardest achievement of all to obtain and it requires high situational awareness and teamwork. There will be a Green Goblin that spawns randomly from any portal at any stage and have to be killed within a few seconds, otherwise he will disappear and the achievement will be failed.
What you need to know - Separate the entire game into three bracket.
Round 21 - 25, Round 26 - 30, Round 31 - 35 respectively.
In every bracket, there will be one Green Goblin that comes out randomly, for example, it can be Round 21, 27, and 33.
They will come out randomly at one of the white portals.
Strategy - Assign every party member at each side of the map (north, south, east, west), and the key to finding the Green Goblin is that whenever at the beginning of a new round, if he spawns, there will be a war horn sound blowing just like the one you hear at DOK/DOTC.
Below is a video to show how to detect and kill the Green Goblin (I'm not sure if i recorded the sound since my comp is pretty screwed, apologies
)NOTE : All the party members have to on their in-game Dragon Nest Sound to hear the war drum.
There's a bug with the Green Goblin whereby they don't spawn at all the possible rounds in the 3rd bracket, this is definitely a bug from the dev's side and if you encounter this, you're just unlucky.
They will not spawn at mission stage like Round 23 (White Hermia) as well.
They will not spawn at survival stages like Round 31 (Mushroom Stage), Round 27 (Lich Stage).
They will not spawn at Boss stages as well, like Round 25 (Manticore), Round 31 (Apocalypse).
He will have a ! mark just like the provoke sign, so its easier to notice him with that. Refer to SS below.
Hatred Pirandello 2 floor challenge mission completed.
Complete all the Hatred Pirandello 2 floor mission.
You don't say ask
[Mission Challenge] - Four Card.
Round 26. Basically, just kill all the small mobs a.k.a. Hatred Dark Elf, and leave all the four purple-named bosses alive. Refer to SS below.
NOTE : Just like Round 32, this stage is random, there are 3 different random stage for Round 26 IIRC.
[Mission Challenge] - Gold Mimic's Curse.
Obtained if every mimic is eliminated within 30 seconds and lose the draw from the event box.
Round 28.
This is the hardest achievement after Goblin Spy's achievement in the whole of P2 Hatred, and has the most misleading description of all as well, this is also one of the main reason why most people couldn't get the achievement title so here goes.
Refer to the SS above.
Basically, to put it simply, you have to kill it in this order - Gold Mimic Chest Boss a.k.a. the Royal Chest boss first, followed by the Pirate boss a.k.a. Captain Darlant, then finally the small Hatred Mimic mob.
In order not to confuse anyone, the trick is that at least one Hatred Mimic mob must be alive so you can complete the killing order.
Strategy - One member lure away as many Hatred Mimic as you can to one side of the map, the rest kills the Gold Mimic boss first followed by Darlant, then finally clear the field. Its okay to kill a few Hatred Mimic during the crossfire in the boss' fight as long as the bunch of mobs at the aggro holder's side is safe.
Then of course the last part, choose the wrong chest, no trick involved here, just pure luck, get the wrong one and congratulations, you've cleared the hardest achievement of the entire dungeon, get the right one? Leave the dungeon and rush your way to Round 28, rinse and repeat
NOTE : I've heard many saying that they followed the requirements above and still didn't get the achievement, according to me testing it myself for more than x rounds while helping most players in Westwood to get it, I've encountered 0% failure rate and 100% success rate WHEN killing them in order and getting the wrong chest with rotten meats, so unless I'm being too lucky on a not-confirmed method/highest-possibility-to-achieve method, something must have gone wrong on your side, just re-do.
This achievement has absolutely nothing to do with the 30-second requirement stated or any time factor as well.
[Mission Challenge] - Pungent Red Mushroom.
There will be like four to six (can't remember the exact amount of red mushrooms) spreaded evenly across the map just like the green ones, just kill all the red ones ASAP and its okay to kill the green ones as well.
[Mission Challenge] - Saving Blan.
Actually this is kinda straightforward, but you need luck as well since you will get either Zebrill or this stage randomly at Round 32, just kill all the monsters and protect the small Cyclops and you're done.
♥ [Mission Challenge] - Stone's rolling!!
Obtained if 4 half Golems are killed in 10 seconds.
Once again, misleading description is misleading, you don't have to kill all of them in 10 seconds, its impossible technically since the time all 5 takes to spawn is more than 10 seconds as well.
Just like the lizard stage of SDN, kill all five of them within 10 seconds and you're done.
Strategy - Lower all of their HP in sync, then lure all of them into the middle as near as possible, use your biggest AoE skill/Ultimate and you're done.
Well, that's about it for the entire achievement list! Do note that it takes really lots of luck and patience to do it, if you're unlucky, you might take few hours or so, if you're lucky, one round/20-30 minutes will settle it.
Tips to make your life easier in your conquest to getting Removing Darkness.
Not encouraging discrimination, but the best line-up you could get to make your life easier.
♦ Saleana / Elestra (Fire Elestra)
Nope, nothing to do with double-freezing, but double freezing is quite effective at certain stage. Flame Road and Fireball are the key here to making your life easier, with elements affecting your damage and the massive AoE and damage of Flame Road and Fireball respectively, you will need them to speed up certain stage for ya.
♦ Physician and Academics in General
Massive heal in Dark Lair, Love Virus, element infused skills, big AoE of Magma Wave and Icicle Expression, what else can you ask for?
Auto Dispenser, best effect with Skill Ring +1.
♦ Mercenary in general.
Battle Howl, obviously. Oh and Howl Charging, a well-timed HC with a good situation awareness Merc is a plus.
♦ Priest (Inquisitor preferably)
Consecration is a very effective utility, Cure relics and Healing relics as well.
Bind Relic to hold a certain mobs at certain stage, Lightning Relic to lure everything into middle in case you guys wanna rush.
♦ Force User in general.
Beyond Time, OP Laser Cutter, element infused skills of Majesty and Mirrors, what else?
♦ Paladin in general.
Conviction/Elemental Auras, element infused skills, great synergy with Inquisitor.
You can actually lure everything into the middle for better clearing if you have great AoE companions.
Aaaaand, those Red Mushroom ???? Flavor gives you a random 30 sec Spirit Boost, 80% CD reduction buff or Divine Avatar.
Oh and did you know, Love Virus invincible effect affects ALL the mobs at Dark Lair 2 including Geraint, not all mobs can be induced with frozen status.
Thanks to xRavey - http://forum.cherrycredits.com

Strawberry Bikini set
How to install:
1. Click the link > http://www.mediafire.com/?61e9nm92hnfayn8
2. Download the correct pak file. The files are all separated to replace your current costume. For example if you are wearing bikini set then simply download the right pak. Or you can just download the .rar file that includes all of it.
3. Put the .pak file into your dragon nest folder. For NA, it is C:/Nexon/DragonNest.
4. Start the game and enjoy! Remember to remove the .pak files before patching the game.
There are two version for every class with the exception of a couple. One chart is for FD, one is for Pure Damage. FD is obvious. Pure Damage is made for alts or those who cannot afford to purchase FD accessories/crests.
Lunar Knight / Moonlord Pure Damage
5 Pieces of the Ancient Totem Set
2 Pieces of the Corrupt Set
Why? Set Bonus!
Get the right Hidden Abilities on your items!
Magic Damage 5.8% ~ 5.8%, Agility 4.5%, Intellect 3.5% on Weapons and Rings!
Intellect 3.5%, Agility 4.5%, HP 6.5% on Armors, Earrings and Necklaces!
Speaking of Accessories:
Crests are totally awesome!
READ MORE
Lunar Knight / Moonlord Pure Damage
5 Pieces of the Ancient Totem Set
- Ancient Totem Helmet (Wind)
- Ancient Totem Shirt (Wind)
- Ancient Totem Pants (Wind)
- Ancient Totem Gloves (Will)
- Ancient Totem Boots (Wind)
2 Pieces of the Corrupt Set
- Corrupt Greatsword (Wind) or (Mag. Power)
- Corrupt Gauntlet (Adorned)
Why? Set Bonus!
| Ancient Totem Bonus x5 | Corrupt Bonus x2 |
| 2 - Increases Max HP: +3,570 3 - Increases Max MP: +3,332 4 - Increases Final Damage: +140 5 - Increases Physical Damage: +210 5 - Increases Magical Damage: +210 | 2 - Increases Magical Damage: +195 2 - Increases Physical Damage: +195 |
Get the right Hidden Abilities on your items!
Magic Damage 5.8% ~ 5.8%, Agility 4.5%, Intellect 3.5% on Weapons and Rings!
Intellect 3.5%, Agility 4.5%, HP 6.5% on Armors, Earrings and Necklaces!
Speaking of Accessories:
|
|
Crests are totally awesome!
|
|
Lunar Knight / Moonlord Final Damage
5 Pieces of the Corrupted Set
2 Pieces of the Victor Set
Why? Set Bonus!
Get the right Hidden Abilities on your items!
Magic Damage 5.8% ~ 5.8%, Agility 4.5%, Intellect 3.5% on Weapons and Rings!
Intellect 3.5%, Agility 4.5%, HP 6.5% on Armors, Earrings and Necklaces!
Speaking of Accessories:
Crests are totally awesome!
Thanks to Castorre
- Corrupted Helmet (Wind)
- Corrupted Shirt (Wind)
- Corrupted Pants (Wind)
- Corrupted Gloves (Will)
- Corrupted Shoes (Wind)
2 Pieces of the Victor Set
- Victor Greatsword (Wind) or (Mag. Power)
- Victor Gauntlet (Adorned)
Why? Set Bonus!
| Corrupted Bonus x5 | Victor Bonus x2 |
| 2 - Increases Magical Damage: +195 2 - Increases Physical Damage: +195 3 - Increases Final Damage: +300 4 - Increases Dark Def: +7.37% 5 - Increases Critical: +1,040 | 2 - Increases Final Damage: +210 |
Get the right Hidden Abilities on your items!
Magic Damage 5.8% ~ 5.8%, Agility 4.5%, Intellect 3.5% on Weapons and Rings!
Intellect 3.5%, Agility 4.5%, HP 6.5% on Armors, Earrings and Necklaces!
Speaking of Accessories:
|
*Make sure the Earrings and Necklace match!
Crests are totally awesome!
|
There are two version for every class with the exception of a couple. One chart is for FD, one is for Pure Damage. FD is obvious. Pure Damage is made for alts or those who cannot afford to purchase FD accessories/crests.
Gladiator Final Damage
READ MORE
Gladiator Pure Damage
5 Pieces of the Ancient Totem Set
2 Pieces of the Corrupt Set
Why? Set Bonus!
Get the right Hidden Abilities on your items!
Physical Damage 5.8 ~5.8%, Agility 4.5%, Strength 4.5% on Weapons and Rings!
Strength 4.5%, Agility 4.5%, HP 6.5% on Armors, Earrings and Necklaces!
Speaking of Accessories:
Crests make everyone more awesome!
- Ancient Totem Helmet (Wind)
- Ancient Totem Shirt (Wind)
- Ancient Totem Pants (Wind)
- Ancient Totem Gloves (Will)
- Ancient Totem Boots (Wind)
2 Pieces of the Corrupt Set
- Corrupt Greatsword (Wind)
- Corrupt Gauntlet (Sturdy)
Why? Set Bonus!
| Ancient Totem Bonus x5 | Corrupt Bonus x2 |
| 2 - Increases Max HP: +3,570 3 - Increases Max MP: +3,332 4 - Increases Final Damage: +140 5 - Increases Physical Damage: +210 5 - Increases Magical Damage: +210 | 2 - Increases Magical Damage: +195 2 - Increases Physical Damage: +195 |
Get the right Hidden Abilities on your items!
Physical Damage 5.8 ~5.8%, Agility 4.5%, Strength 4.5% on Weapons and Rings!
Strength 4.5%, Agility 4.5%, HP 6.5% on Armors, Earrings and Necklaces!
Speaking of Accessories:
|
|
Crests make everyone more awesome!
|
|
Gladiator Final Damage
5 Pieces of the Corrupt Set
2 Pieces of the Victor Set
Why? Set Bonus!
Get the right Hidden Abilities on your items!
Speaking of Accessories:
Crests make everyone more awesome!
- Corrupt Helmet (Wind)
- Corrupt Shirt (Wind)
- Corrupt Pants (Wind)
- Corrupt Gloves (Will)
- Corrupt Boots (Wind)
2 Pieces of the Victor Set
- Victor Greatsword (Wind)
- Victor Gauntlet (Sturdy)
Why? Set Bonus!
| Corrupt Bonus x5 | Victor Bonus x2 |
| 2 - Increases Magical Damage: +195 2 - Increases Physical Damage: +195 3 - Increases Final Damage: +300 4 - Increases Dark Def: +7.37% 5 - Increases Critical: +1,040 | 2 - Increases Final Damage: +210 |
Get the right Hidden Abilities on your items!
Physical Damage 5.8% ~ 5.8%, Agility 4.5%, Strength 4.5% on Weapons and Rings!
Strength 4.5%, Agility 4.5%, HP 6.5% on Armors, Earrings and Necklaces!
Speaking of Accessories:
|
|
*Make sure the Earrings and Necklace match!
Crests make everyone more awesome!
|
|
Thanks to Castorre

New Dungeon > Path of Ampar
Actually there are a lot of players who always need to know where the royal chest in all 50 dungeons.
Especially the 5 New Dungeon ! (Path of Ampar)
Lotus Marsh gets its first major update! Embark on new story quests and side quests, and 5 new Lv. 40-50 dungeons!
Lotus Marsh gets its first major update! Embark on new story quests and side quests, and 5 new Lv. 40-50 dungeons!
More info about Lotus Marsh Expands Click here :)
Screen Shoot Royal Chest Locations :


Lost T'ratsa Village :
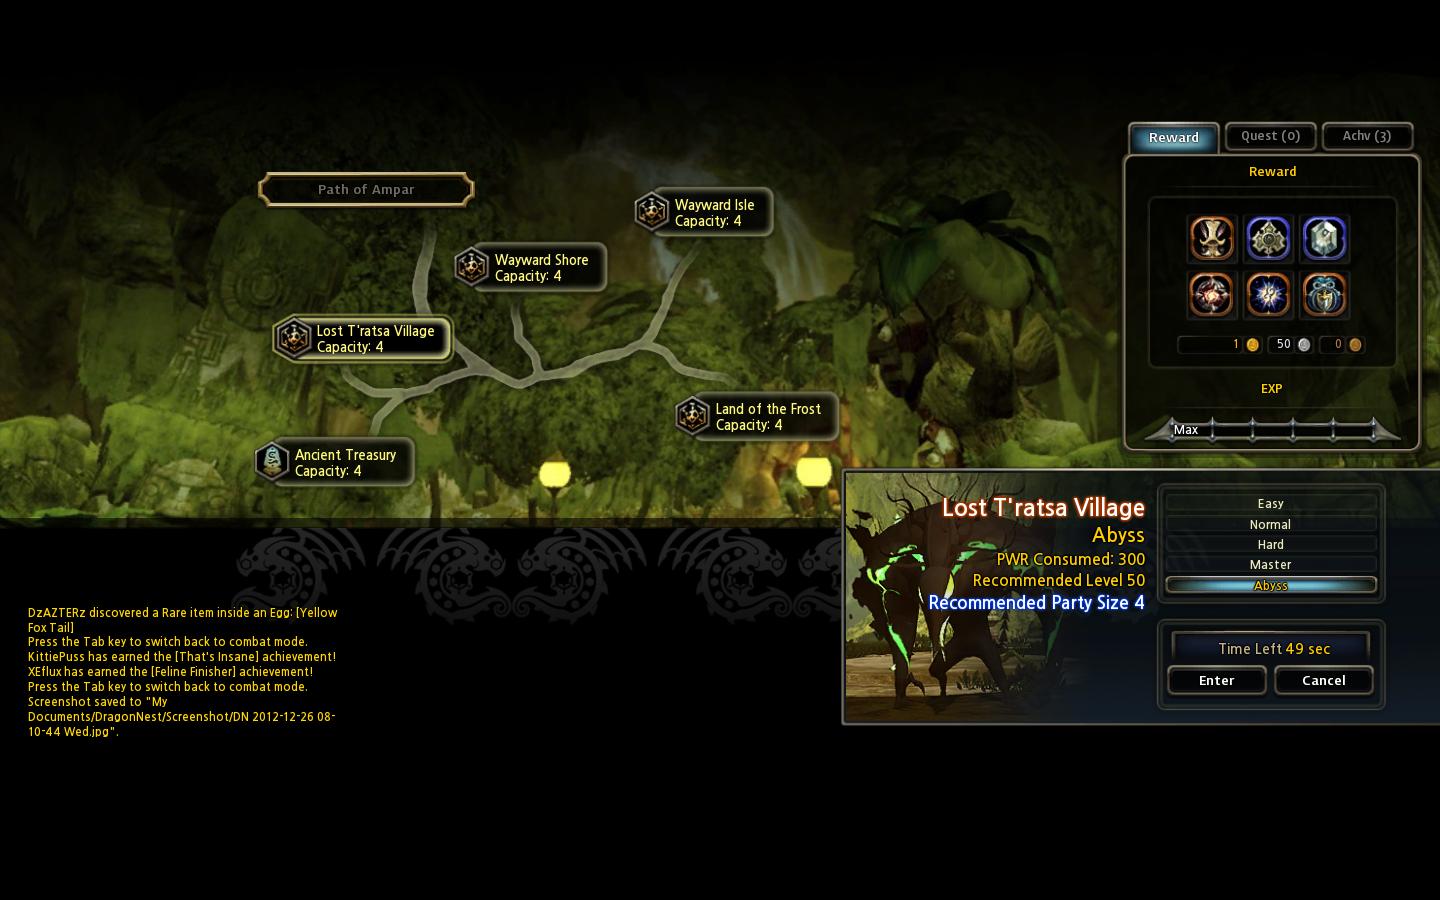

Wayward Shore :


Wayward Isle :


Land of The Frost :


Dragon Nest is now available through Steam! You can now connect with millions of players and have instant access to your favorite games and easily chat with all your Steam friends in-game.
Steam also provides Automatic Game Updates, so you can no longer have to worry about patch dates or new installs.
Thanks For Nexon

How to install:
1. Click the link
2. Download the correct pak file. The files are all separated to replace. Or you can just download the .rar file that includes all of it.
3. Put the .pak file into your dragon nest folder. For NA, it is C:/Nexon/DragonNest.
4. Start the game and enjoy! Remember to remove the .pak files before patching the game. :)
Link Download Click Here
Enjoy :)
First of all , I would like to emphasis that Skill Builds are very unique and meant to be cope with gamers' play style. So , take this as a guide line but don't follow it solely.
Before going into details of the Barbarian Build, as usual, I will show the description of the 3 new skills first.
Heat Combo: 12% Chance at lvl2 to inflict additional phy. damage equal to your attack status. CD 7sec.
Stomp EX: Enhanced version of Stomp, with improved AOE. The 2nd wave of stomp EX deal 30% additional damage and also induce slow effect.
Bone Crash: Leap into the air and deal phy dmg 395.6%+1740 at lv1, cd 35sec. Induce “bone break” effect which deals additional 239 damage per hit for 10sec. Damage increase applies even if the target is hit by your party member. Direction can be controlled in air too.
Alright, let’s take a look at the build.


Before I start, I wish to state that this build given is mainly for PvE because certain skills like Rising Slash and Drop Kick, which are good in PvP are ignored. The build shown also has 23 SP remaining.
Warrior Skills
Circle Break – Ignored in the build because Mercenary has really too many skills to spam.
Impact Wave – Ignored because of same reason as above and it is a magic type attack skill.
Rising Slash – Ignored because Mercenary has really too many skills to spam.
Heavy Slash – Lv 5 in this build. Pre-requisite for skills in Mercenary Tree.
Relieve – This skill was raised to level 4 because of the lower cooldown, but not max-ed on 5. Points were used on Dash Kick.
Dash – Lv 5 max-ed.
Dash Kick – Lv 3. I am not sure why this is added because it seems like a useless skill. I would use the SP from here on Drop Kick or Rising Slash or Relieve. This skill is learnt probably as a consequential attack after Dashing. Normally, people would use Dash Upper to attack right after Dash but since this build wanted to focus more on howls, there isn’t enough SP to add Dash Upper and Soccer Kick Combo.
Physical Mastery/Mental Mastery/Mental Training – In this build, all 3 skills are max-ed. Personal preference again to see if you need SP else where. Refer to discussion on other Warrior Skills above.
- Mercenary Skills
Taunting Howl – Lv 4. Probably added for additional duration and better debuffing capabilities. Another Barbarian build which I am in favour of is the one in MMOsite forum. He is one of the strongest Barbarian in DN CN and has killed the Sea Dragon before. He added lv 10 for Taunting Howl. Do check out his guide for more reference. I realise it really makes quite a big difference when this skill is raised high. Duration 15 seconds, cooldown 25.5 seconds. Debuff damage by 20% and critical by 40% and the skill is usable again after just 10.5 seconds. Simply Amazing. Do also note that there is a new update to limit (80%) how much damage-received reduction you can debuff on a monster. So using lv 10 Taunting Howl with Devastating Howl will no longer give you 100% damage-received reduction.
Stomp – Lv 11 to unlock Stomp Ex.
Disenchanting Howl – Lv 3. Better debuffing. Nuff said.
Battle Howl – Lv 4 instead of max-ed. Probably needed more points in Taunting Howl and Disenchanting Howl for balance.
Whirlwind/
Rolling Attack – Both only at lv 3. This build focuses more on support, that is why the damage is not taken into consideration.
Iron Skin – Lv 5. From lv 4 to 5, the increase is 2.5% and not 5% from lv 1 to 4 per level. That is the reason why some people may prefer to stick to lv 4 and use the SP elsewhere.
Panic Howl – Lv 1. Personal preference whether to increase or not.
Devastating Howl – IMO, lv 1 is enough but this build is at lv 2.
- Barbarian Skills


That’s all for now. Feel free to comment. You may want to provide feedback. Thanks alot!


